
– Alienware Employee
Are you an unlucky Alienware Aurora owner?
I offer front panel and side panel modification service for significantly lower operating temperature, noise, and increased lifespan.
To get started, submit a ticket.
 Mr. Robot
– Alienware Employee
Are you an unlucky Alienware Aurora owner?
I offer front panel and side panel modification service for significantly lower operating temperature, noise, and increased lifespan.
To get started, submit a ticket.
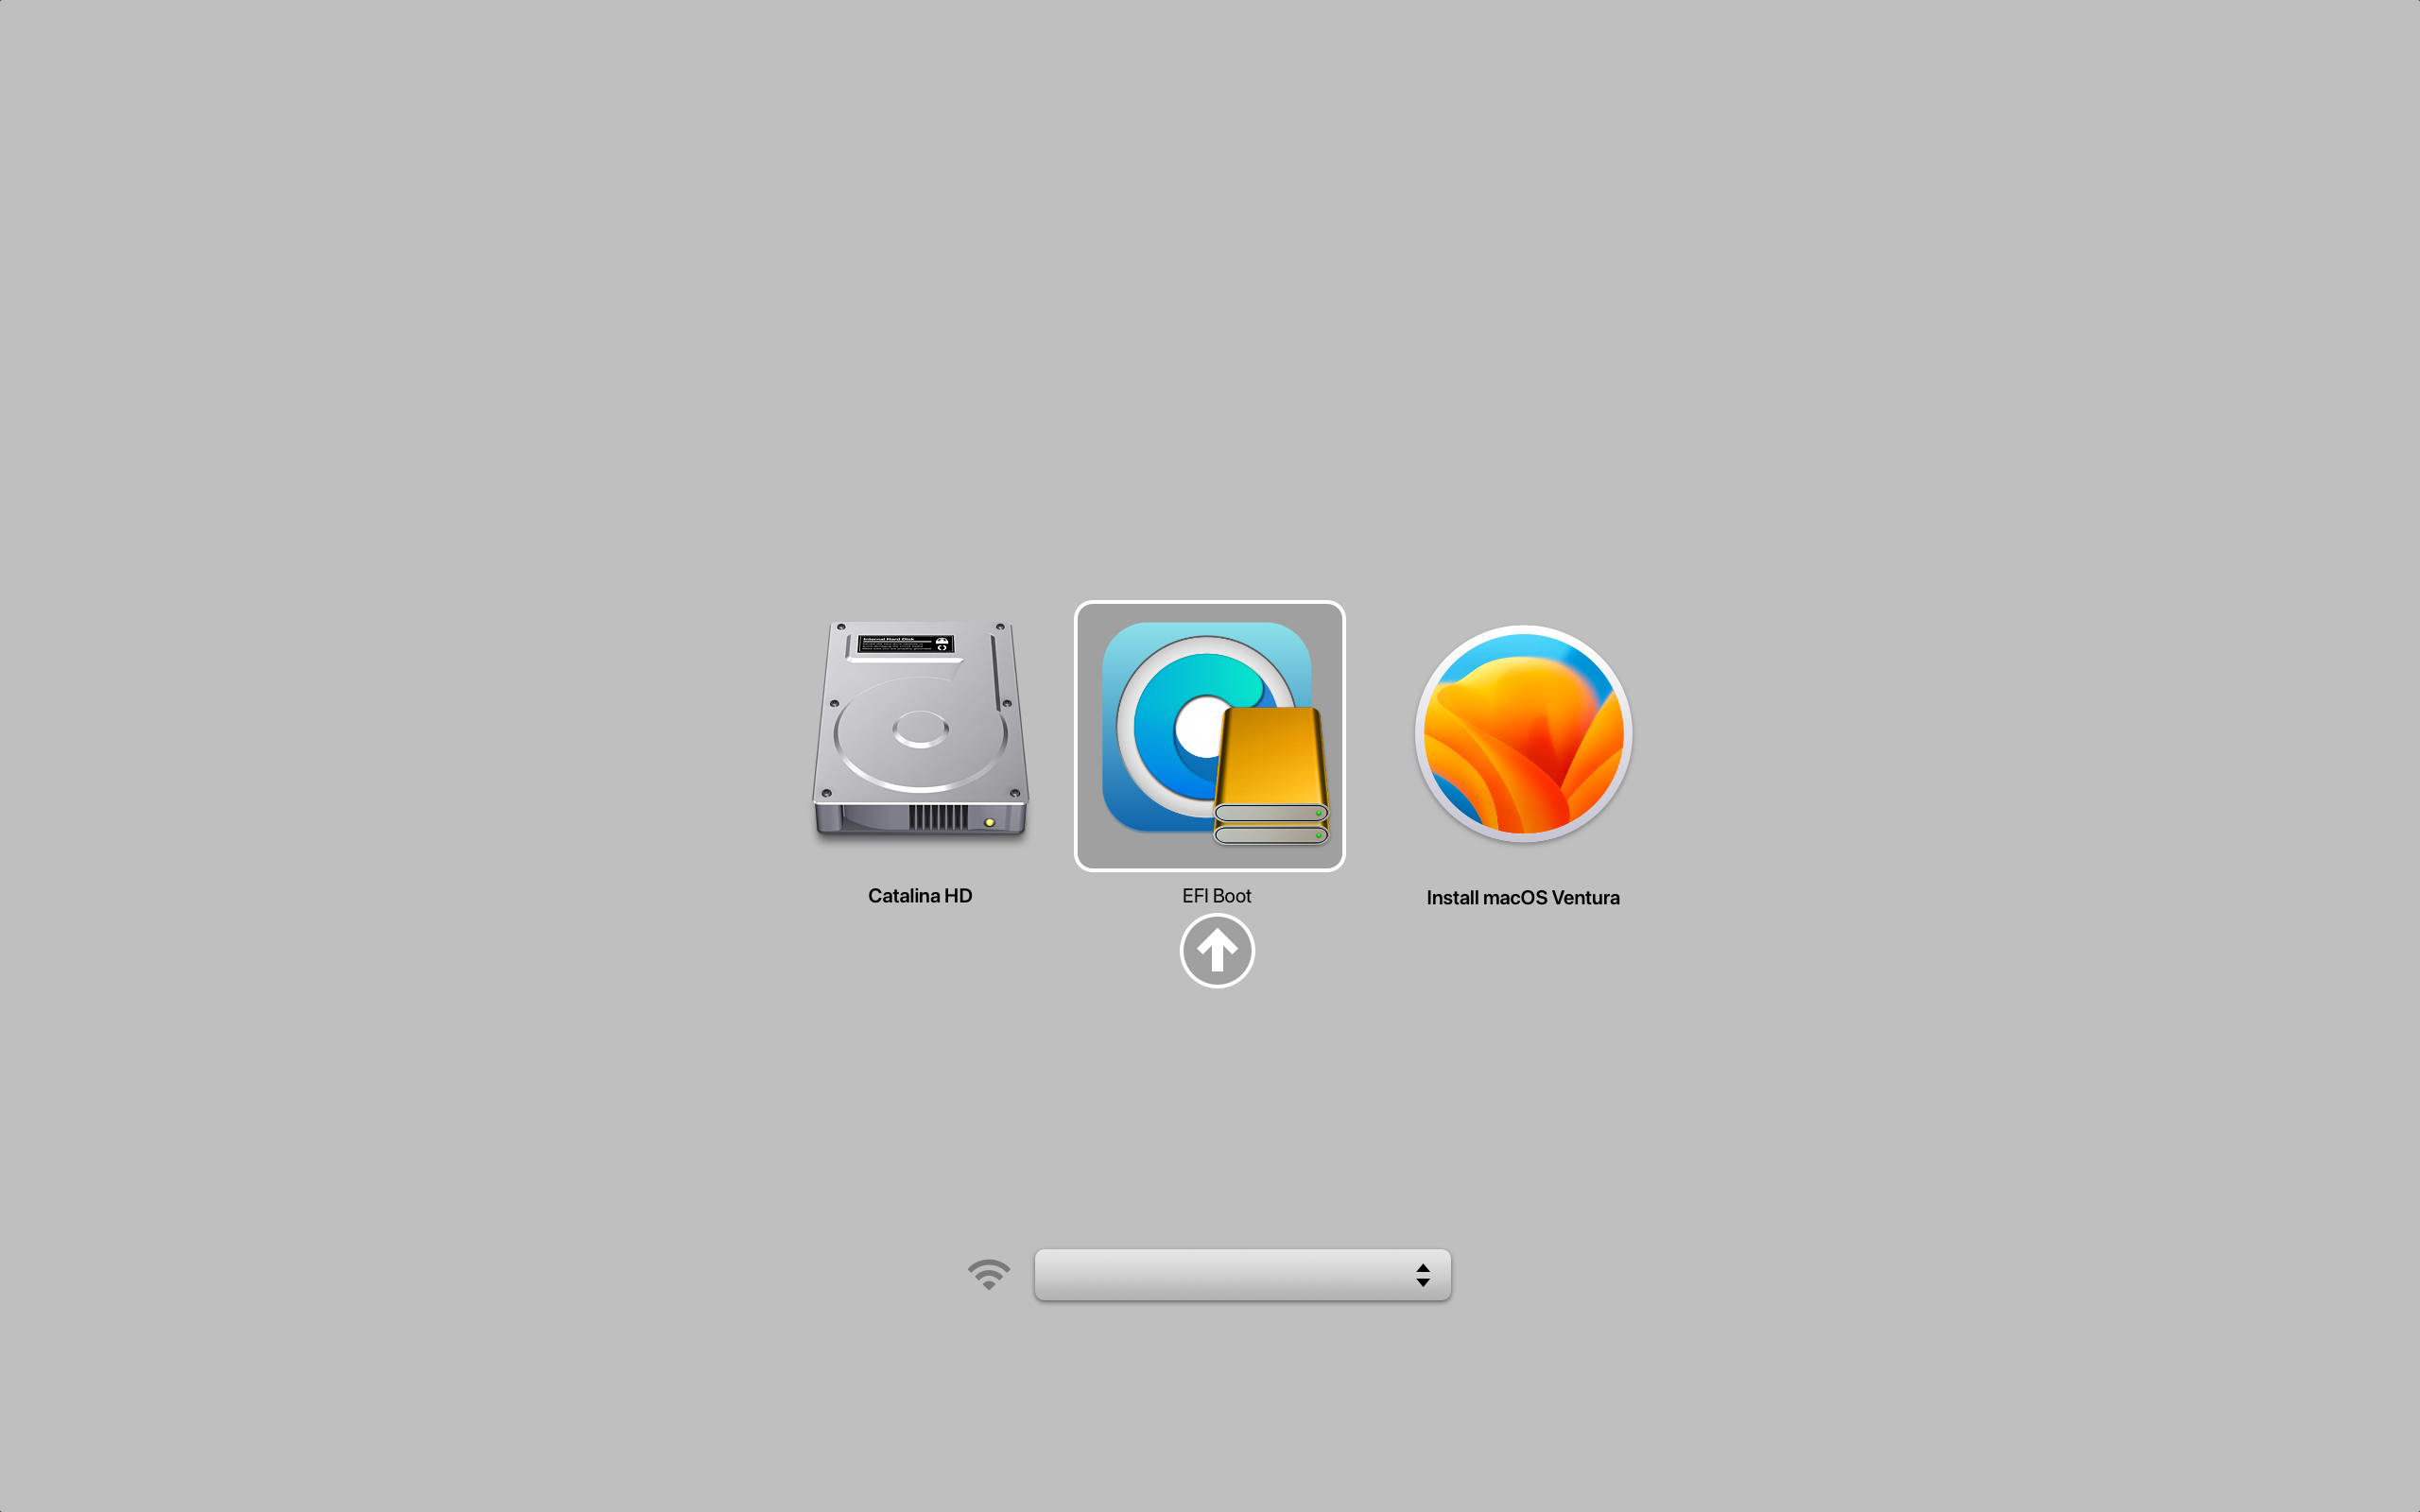
Before attempting any method, you need a DEP-free admin user established!
To do this, wipe and re-install macOS fresh without internet so the DEP profile cannot be established. Instructions to do so are below.
How to reinstall macOS on supported Macs
How to install latest macOS on Unsupported Macs
Open terminal, type:
sudo nano /etc/hostsTo the end of this section, add
127.0.0.1 iprofiles.apple.comThe result should look like this:
##
# Host Database
#
# localhost is used to configure the loopback interface
# when the system is booting.  Do not change this entry.
##
127.0.0.1       localhost
255.255.255.255 broadcasthost
::1             localhost
127.0.0.1       iprofiles.apple.com
Use Control + O to write then the “Return” key so that it writes over that file, then Control + X to exit.
With this one simple line added, there will be no notifications.
Reboot.
sudo profiles show -type enrollment
Now results in the following error:
Error fetching Device Enrollment configuration: (34006) Error Domain=MCCloudConfigurationErrorDomain Code=34006 "The Device Enrollment server is unavailable. Please try again later." UserInfo={USEnglishDescription=CLOUD_CONFIG_MAX_RETRIES_EXCEEDED, NSLocalizedDescription=The Device Enrollment server is unavailable. Please try again later., MCErrorType=MCFatalError}ASUS’ actions relating to the Exploding Ryzen CPU debacle are disgraceful and abrasive to the trust that the brand has earned. ASUS has demonstrated clearly it wishes to not only avoid supporting users, but actively engineers ways to abandon them. ASUS’ updates haven’t even fixed the problems, yet they posture as if they have while simultaneously suggesting that users ‘just run defaults’ on their $700 motherboards, as if that makes any sense whatsoever. So, to accommodate ASUS’ request, we ran defaults and re-benchmarked the Ryzen 7000 series. It sucks. Big surprise. They also don’t support their own BIOSes for the ASUS ROG boards.
This is our Failure Analysis report of the AMD Ryzen 7800X3D CPUs that exploded on our test benches — some as a result of over-current, some as a result of degradation leading to failure.
We worked with an external Failure Analysis Lab to evaluate the result of AMD 7800X3D CPUs getting too much voltage (VSOC especially) and likely too much current, especially in scenarios where ASUS OCP fails to do anything useful.
This complements our prior Root Cause Analysis we performed in part 1, linked below, and uses a scanning electron microscope, C-mode scanning acoustic microscopy, and more to investigate a burned CPU that came out of an ASUS board.
While it probably won’t become a real thing due to Capitalist agendas, this is a step in the right direction.
This gives the screen a floating hinge in the style of the Surface Studio or an iPad Pro with Magic Keyboard — and, in theory, this also allows for improved cooling without the vents being blocked by the desk.
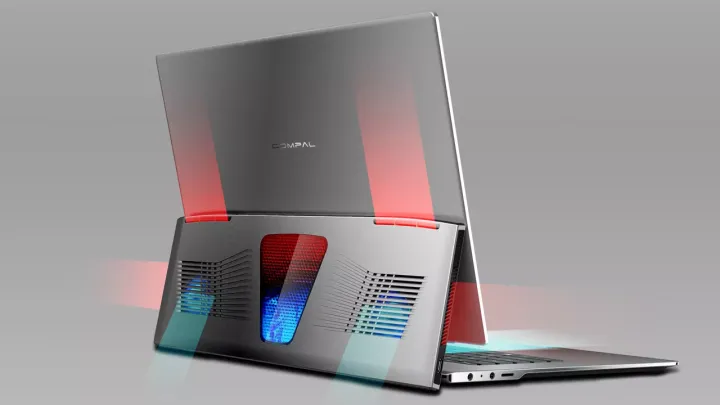
Full article: https://www.digitaltrends.com/computing/compal-veneo-concept-shows-ingenius-design/
NOTICE: For ASUS laptops, please use G-Helper instead, for more details see: ASUS Laptop Undervolting – Mr. Robot
During CES 2023 Gordon got a demo of AirJet – a potentially revolutionary solid state active cooling system for tech like laptops. In this video Gordon gets a tour of the labs at Frore Systems and follows up with Seshu Madhavapeddy, the Founder and CEO, about some of the biggest questions people had concerning this technology. He also gets to check out how the AirJet is tested for things like dust and reliability.
In this review, we’re benchmarking the Origin Genesis ~$6000 pre-built gaming computer with full custom loop water cooling. Origin is owned by Corsair, and the pre-built we’re reviewing uses a mixture of Corsair components with boards from other brands. Its main problems include incorrect CPU configuration that costs over 20% of the native performance, bad fan speed configuration, bad custom paint job, and more. On the upside, the cable management is very impressive — we’ll have a separate tear-down showing some of that.
For most laptops, typically ThrottleStop or UXTU is the best choice to get temps under control.
For ASUS laptops, there is a tool called G-Helper that’s designed specifically for ASUS and to replaced the bloated ASUS components that waste system resources and infringe upon your privacy, in addition to providing undervolting & fan curve control.
Recommend to wipe and reload windows then avoid installing all ASUS apps for optimal system performance.


2012-2015 13″ & 15″ models
2016-2017 13″ w/o Touch Bar
For more details on compatibility visit Laptops
Want to Upgrade? Submit a ticket
OpenCore-Patcher-GUI.app.zip from https://github.com/dortania/OpenCore-Legacy-Patcher/releases


OptionControl key will make this the default boot entry):